My friend Bill and I wanted a simple phono pre-amp for shop use, one that was not expensive but would give high end performance. I like the KISS principle and picked the recommended circuit from the National Semiconductor datasheet using two LME49720 op amps.
Two sockets, two chips, two 9V batteries, a switch, two 100uf power supply caps and a handful of .1% and 1% resistors with Panasonic polypropylene caps assembled by Bill on a RatShack perf board and the simple little preamp sounded VERY good! On initial listening to an acoustic performance it was open, airy and very detailed. It was much better than the internal phono pre of the “inexpensive” shop receiver.
For a total outlay under $50, we were quite pleased. I shared this breadboard phono pre amp with the good folks at Audiokarma.org. The DIY crowd there then ran with it and went so far as to create PC boards and build of material lists. The thread is over 125 pages, 2500 replies and 420,000 views. People from all over the world have built these little wonders that the group dubbed “CNC” for Charlotte, North Carolina. The pc board and BOM include switchable input loading so you can try different loads on your favorite moving magnet cartridge. Industry standard is 47k ohm. With the CNC you can also try 18k, 32k and 62k to fine tune the sound. There are also discussions about plugin power supplies so you are not reliant on batteries, including schematics and PC board layouts. I prefer batteries as they provide cleaner DC power. But if you forget to turn off the CNC after use there go your new 9 volts (ask me how I know…) Lantern batteries, rechargeable batteries or AGM batteries are also options. This thread is a wealth of DIY information, including tips on how to populate a pc board and tips on soldering.
You don’t have to have a premade PC board, but it does make assembly easier.
This pre-amp is also a great way to see for yourself if component changes affect the sound quality. Is there a difference in sound between types of capacitors? How about Op-amps? I believe there are audible differences, especially when you are amplifying a small signal in the millivolts. But don’t take my word for it. The CNC is affordable enough you can try the different components and listen and make your own decisions. My personal preference in op amps is either a pair of Burr Brown OPA2134 or replace the first Opamp with an LME4990 (you will have to put the surface mount chip on a Brown Dog adapter) or LM4562. I also prefer Polypropylene film and foil capacitors for the 1uf DC blocking/coupling capacitor, like the WIMA FKP series. You can also experiment with bypassing the 1uf with .1uf or .01uf caps. I like the Russian Teflon film capacitors as they are affordable and have a very clean top end. Some folks swear by NOS or Russian paper in oil capacitors.
You will need a case for your pre amp. I have used jewelry boxes, cigar boxes and rat shack aluminum and plastic cases. Bill put the first board in a small, plastic toolbox. I have even gone to an arts and crafts store and used a basswood craft box that looked like a book with hinged lid. Use your imagination- repurpose something that will look cool on your shelf. Happy Listening!
Preliminary Bill of Materials:
| Quantity | Component |
| 1 | PCB Board |
| 2 | Resistors 0.25W, 100 ohm |
| 2 | Resistors 0.25W, 130 ohm |
| 2 | Resistors 0.25W, 180 ohm |
| 6 | Resistors 0.25W, 300 ohm |
| 2 | Resistors 0.25W, 2k2 ohm |
| 4 | Resistors 0.25W, 3k3 ohm |
| 2 | Resistors 0.25W, 16k ohm |
| 2 | Resistors 0.25W, 33k ohm |
| 2 | Resistors 0.25W, 82k ohm |
| 4 | Resistors 0.25W, 110k ohm |
| 2 | Resistors 0.25W, 150k ohm |
| 2 | 8-Pin DIL Sockets |
| 2 | 2-Way DIP Switches |
| 2 | 4-Way DIP Switches |
| 2 | AD823 or OPA2134 or LM4562 Op Amps |
| 4 | Ceramic Capacitors, 100 nF |
| 2 | Polyester Film Capacitors, 47 nF |
| 4 | Polyester Film Capacitors, 68 nF |
| 2 | Polyester Film Capacitors, 1 uF |
| 4 | Electrolytic Capacitors, 22 uF |
| 2 | DG301 Screw Terminals, Two Positions |
| 2 | DG301 Screw Terminals, Three Positions |
| 2 | 9V Batteries |
| 2 | 9V Battery Connectors |
Note: The schematic above should be considered preliminary. A complete, detailed schematic will appear in Copper #22, along with a source for finished circuit boards and a link to a Digi-Key shopping cart to simplify purchase of parts. For the PCB work and BOM we give credit and thanks to http://muffsy.com ! —Ed.
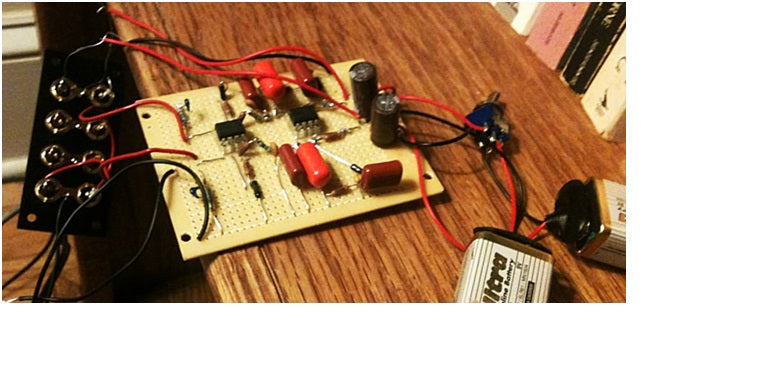
Board #1—before it was christened “CNC”.

“CNC” phono stage in flea market jewelry box.

Inside the jewelry box.
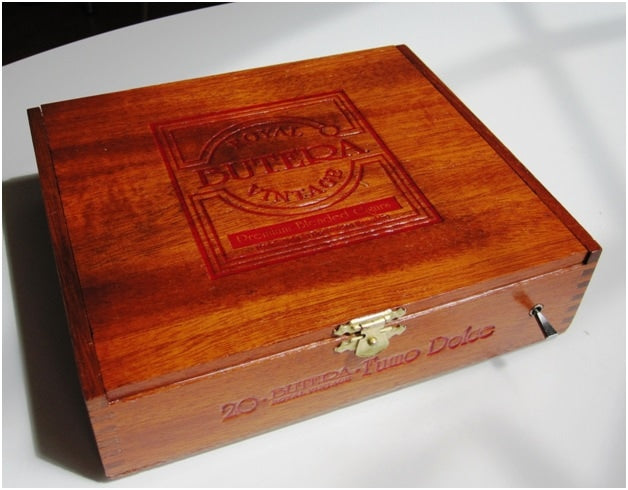
This wooden cigar box cost me $1 at the flea market.


The box had room for spare batteries. The holders were also from Digikey.

Second “CNC” phono stage in a Godinger jewelry box- RCA jacks moved to back.

“TurntableDaddy” Big Bill put board #1 in a cheap toolbox for shop use!

The extra space in the toolbox allowed use of lantern batteries.